Introduction to Raspberry Pi – Programming in C++
-
This tutorial assumes that you have already established a SSH connection to the Raspberry Pi.
This connection will be used to program the Raspberry Pi in C++.
All commands executed take place within the PuTTY terminal.
It was developed by Michael Lescisin under the supervision of Dr. Qusay H. Mahmoud.

This tutorial will explore three unique ways to develop software on the Raspberry Pi using C++:
The goal is to give users a choice on how they would like to run their programming environment. Some methods are more convenient then others, and will often depend on the users specific needs.
- Using GNU Nano
- Using WinSCP (to transfer files)
- Using an IDE
The goal is to give users a choice on how they would like to run their programming environment. Some methods are more convenient then others, and will often depend on the users specific needs.
| Component | Quantity | Description | Where to Buy |
|---|---|---|---|
| Raspberry Pi | 1 |  |
Canada, USA |
| SD card with Raspbian image installed | 1 |  |
Canada, USA |
| 5V USB Power Supply (a laptop or desktop will work for this) | 1 | - | - |
| USB A micro Cable | 1 | 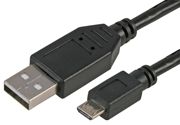 |
Canada, USA |
| Ethernet Cable | 1 | 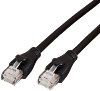 |
Canada, USA |
Programming using GNU nano:
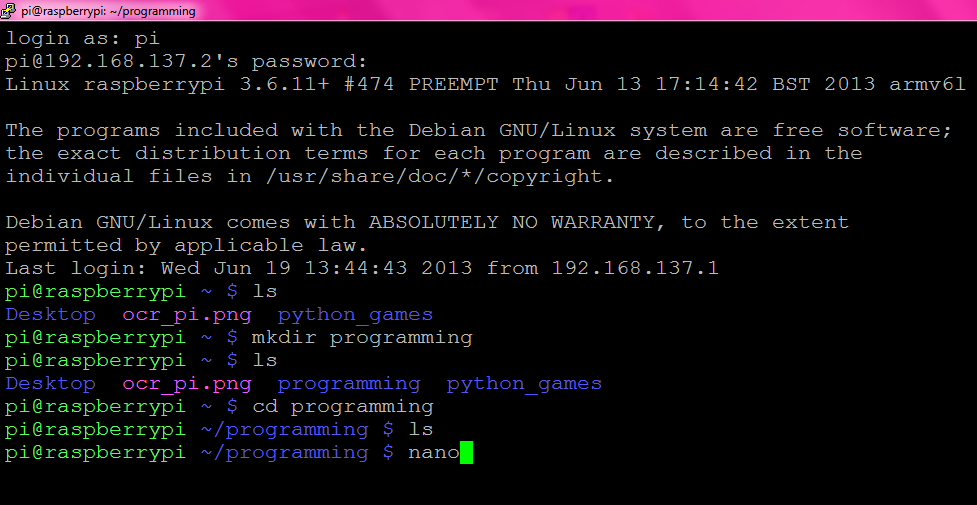
Once an SSH session has been started between the Raspberry Pi and the laptop create a new directory called “programming” by running the command
mkdir programming.
Then enter the directory by running cd programming and finally open up the nano text editor by running the command nano.
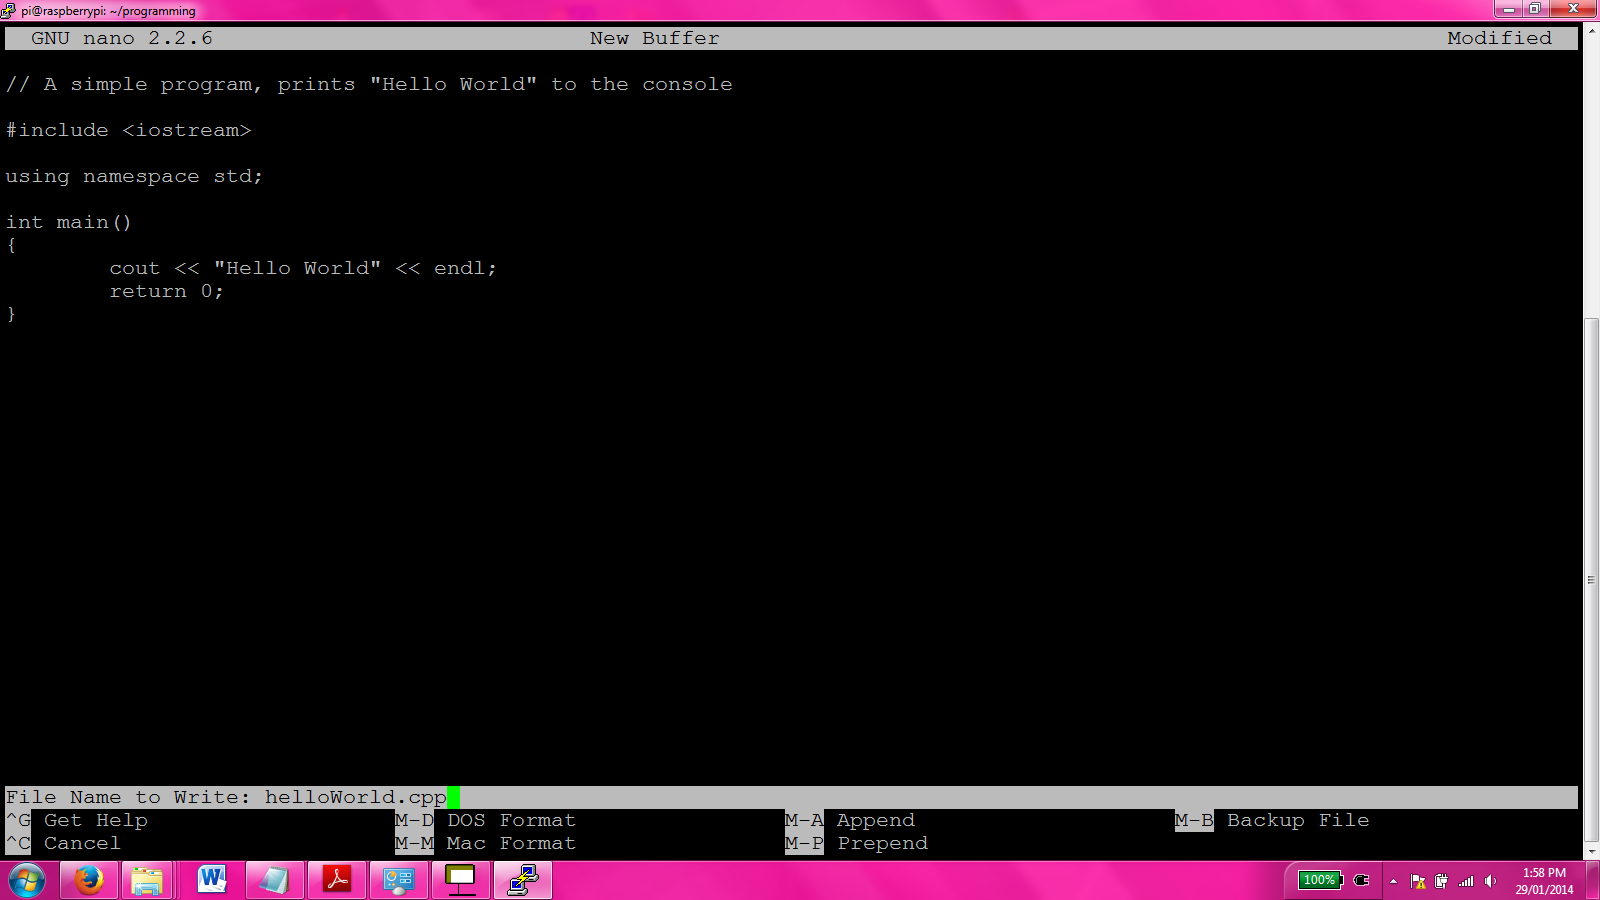
Within the nano text editor type out the following HelloWorld program:
Save the program by pressing Ctrl+O, name it helloWorld.cpp and press enter. Then exit nano by pressing Ctrl+X.
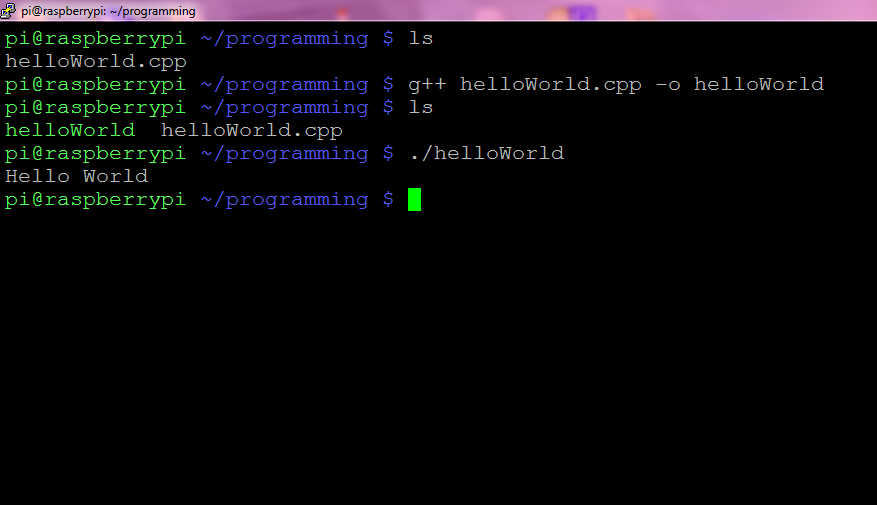
Compile the program by running
Now run the program by typing the command
This should display “Hello World” on the console.
g++ helloWorld.cpp -o helloWorld
Now run the program by typing the command
./helloWorld
This should display “Hello World” on the console.
Transferring Files with WinSCP:
Now, for many upcoming tasks, you should know how to move files between the Raspberry Pi and your laptop. This tutorial will use WinSCP to move files between these two devices using the SCP protocol.
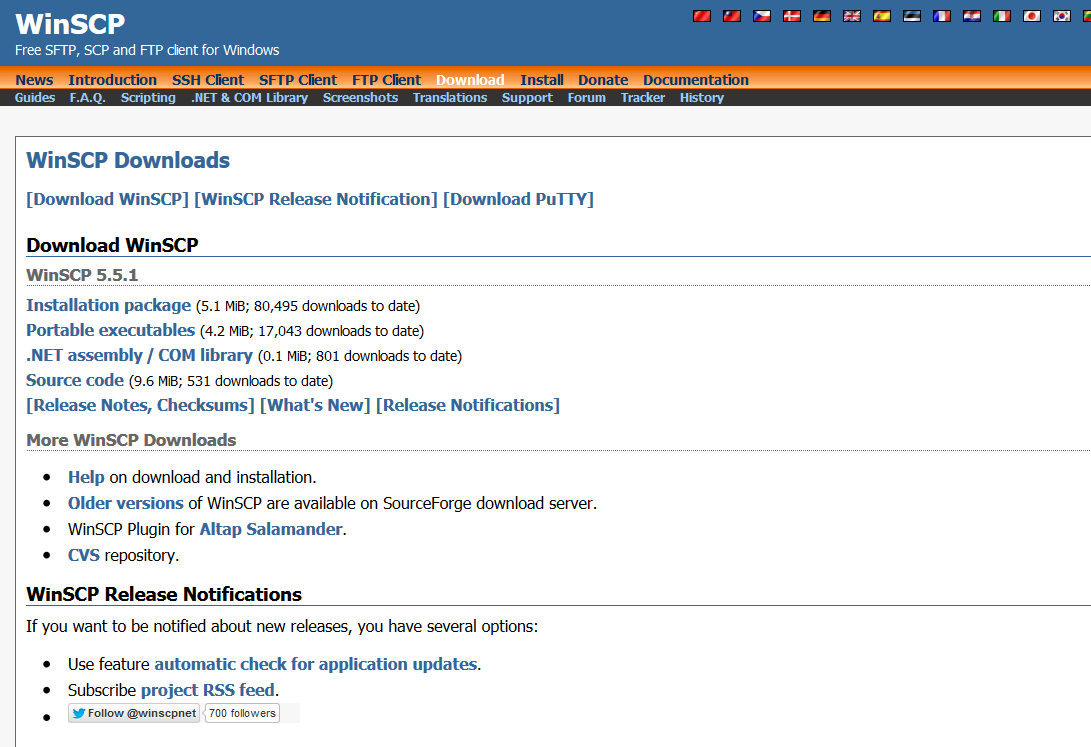
First download WinSCP by going to http://winscp.net/eng/download.php and clicking on Installation package. Choose the Typical installation and choose Commander.
First download WinSCP by going to http://winscp.net/eng/download.php and clicking on Installation package. Choose the Typical installation and choose Commander.

Launch WinSCP, set File protocol: to SCP, Host name: to 192.168.137.2, keep Port number: to 22, set Username: pi and Password: raspberry
Then click Login. Click Yes to add the key. You now should be presented with a file navigator for the laptop and a file navigator for the Raspberry Pi.
Then click Login. Click Yes to add the key. You now should be presented with a file navigator for the laptop and a file navigator for the Raspberry Pi.
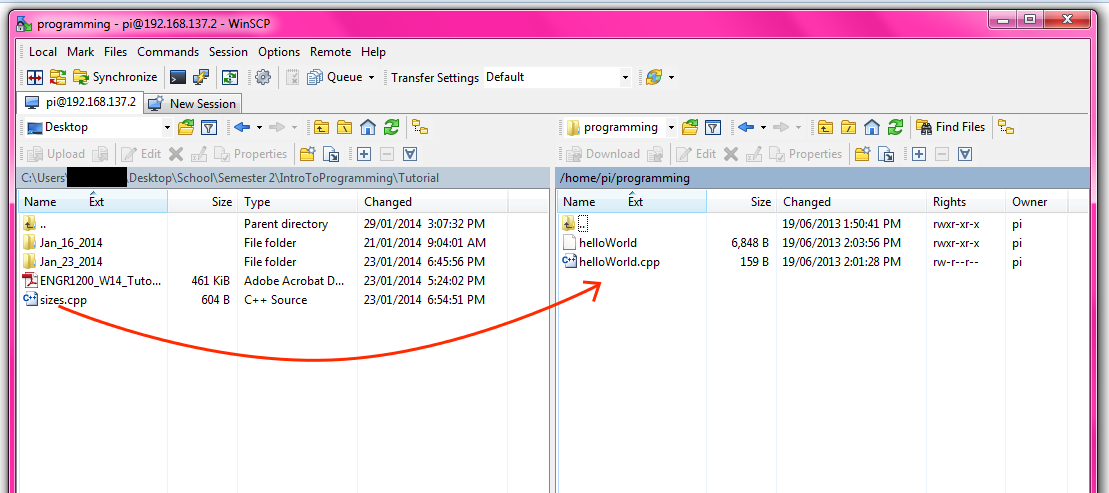
Using WinSCP, upload a file that you've already created in C++ on your laptop, to the Raspberry Pi.
Do this by clicking and dragging the file from the left (laptop) pane to the right (Raspberry Pi) pane.
Click OK to any dialog that appears about naming the file. In this example we uploaded a file called sizes.cpp from a laptop to the Raspberry Pi.
You may now exit WinSCP.
Compiling this file is similar to the previous example. SSH into the Raspberry Pi,
Running
Click OK to any dialog that appears about naming the file. In this example we uploaded a file called sizes.cpp from a laptop to the Raspberry Pi.
You may now exit WinSCP.
Compiling this file is similar to the previous example. SSH into the Raspberry Pi,
cd programming and then g++ sizes.cpp -o sizes
Running
./sizes will execute the program.
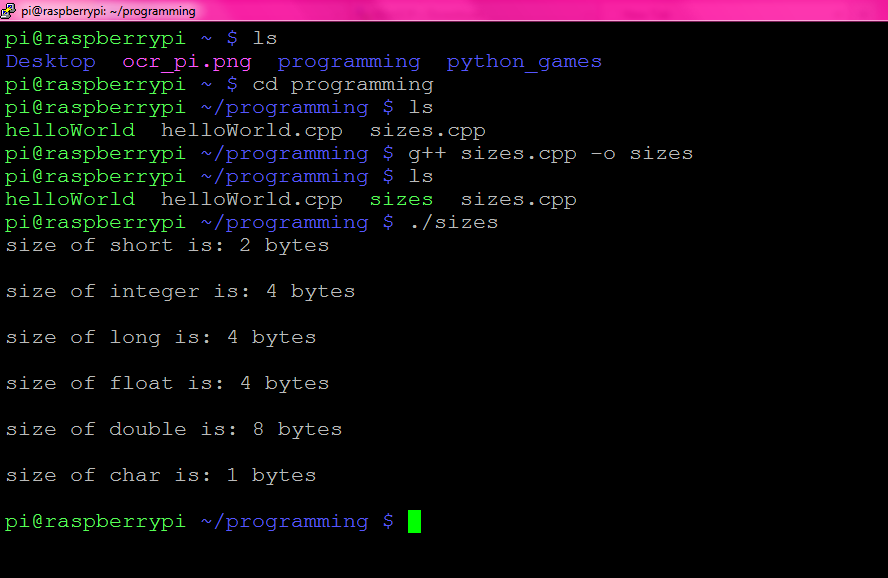
NOTE: any lines with system(“pause”) must be deleted or commented out for the program to work on the Raspberry Pi.
Congratulations, you are now able to write code on your laptop with your favourite text editor, then compile it and run it on the Raspberry Pi.
Congratulations, you are now able to write code on your laptop with your favourite text editor, then compile it and run it on the Raspberry Pi.
Using an Integrated Development Environment (IDE):
VisualGDB is a program that allows programmers to write code in Microsoft Visual Studio for the Raspberry Pi. Please be aware that this program only works for 30 days with the free trial.
Install VisualGDB by going to www.visualgdb.com/tutorials/raspberry and clicking on "VisualGDB for Visual Studio Download now!".
Download this file and run it, choose "Quick installation".
Install VisualGDB by going to www.visualgdb.com/tutorials/raspberry and clicking on "VisualGDB for Visual Studio Download now!".
Download this file and run it, choose "Quick installation".
From here we will be following the tutorial at www.visualgdb.com/tutorials/raspberry/ feel free to refer to this site.
Start the DHCP server on your laptop and connect it via Ethernet cable as if we were going to make an SSH connection to it (See tutorial 2 for this).
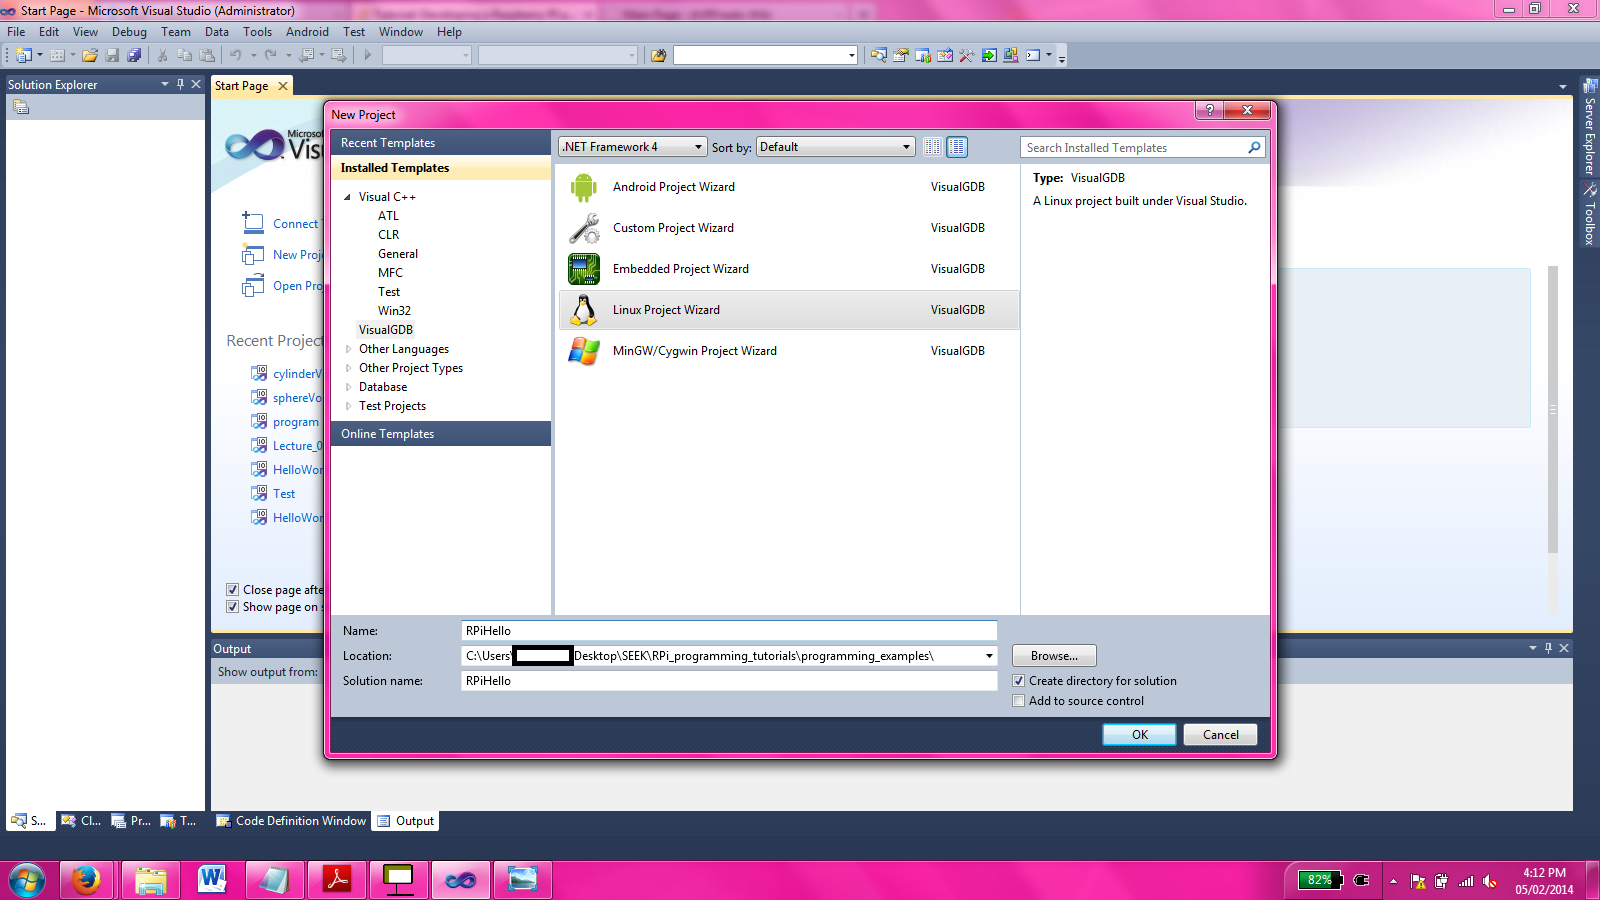
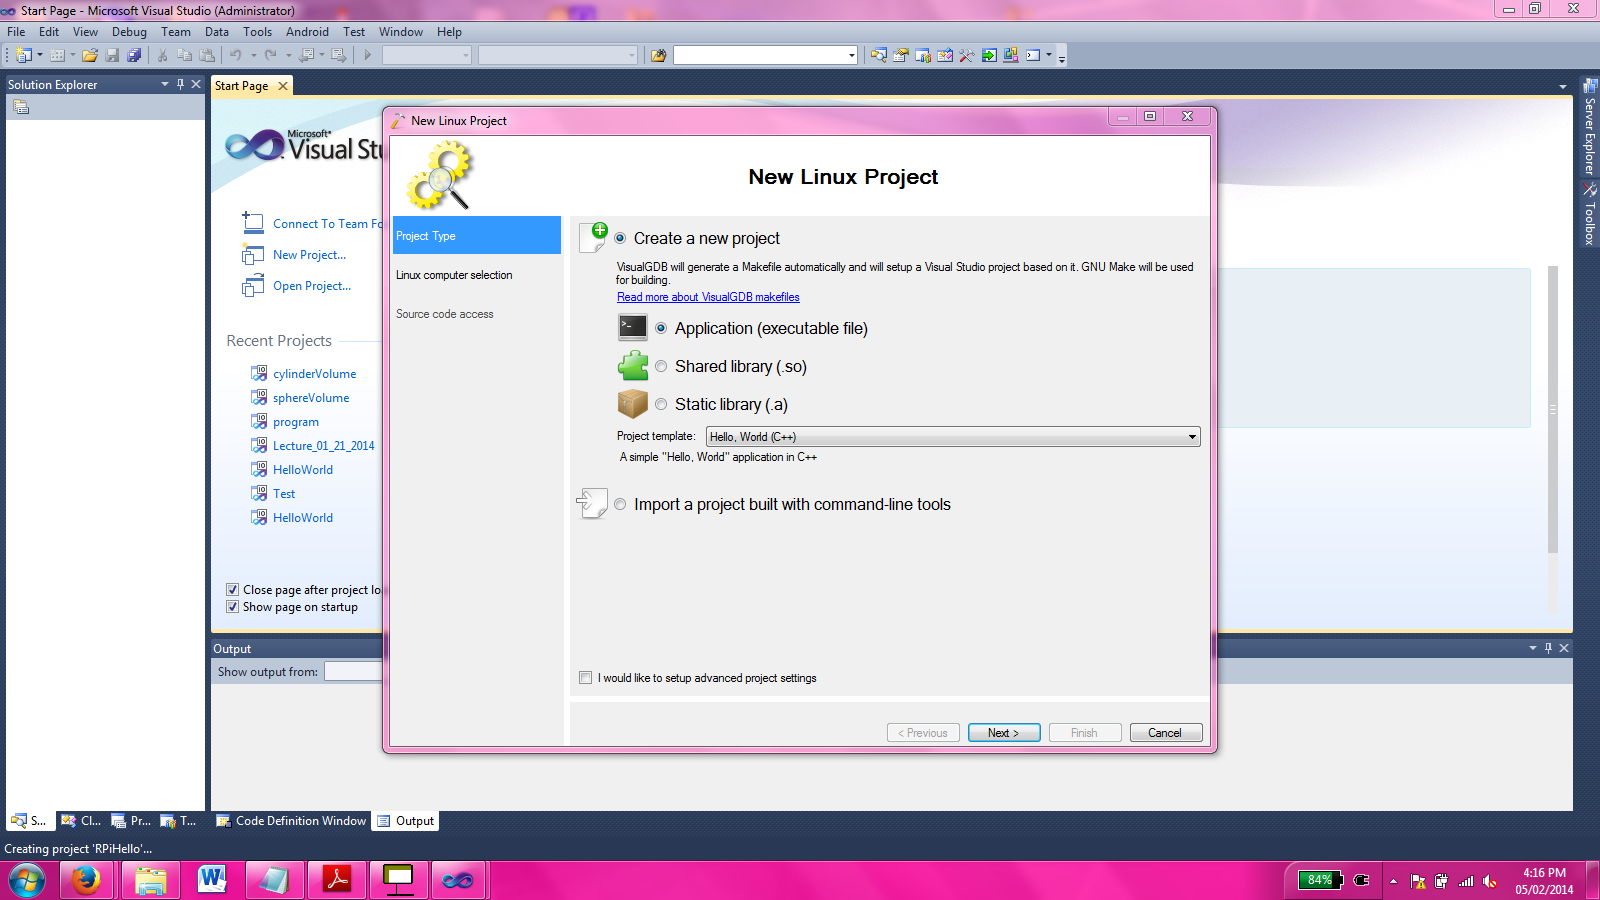
Next, open Microsoft Visual Studio. Go to File → New → Project. Select "Visual GDB" and choose "Linux Project Wizard". Give it a name and location to save the project. On the next screen, choose Application (executable file) and set "Project template:" to "Hello, World (C++)". After this, click "Next".
Start the DHCP server on your laptop and connect it via Ethernet cable as if we were going to make an SSH connection to it (See tutorial 2 for this).
Next, open Microsoft Visual Studio. Go to File → New → Project. Select "Visual GDB" and choose "Linux Project Wizard". Give it a name and location to save the project. On the next screen, choose Application (executable file) and set "Project template:" to "Hello, World (C++)". After this, click "Next".
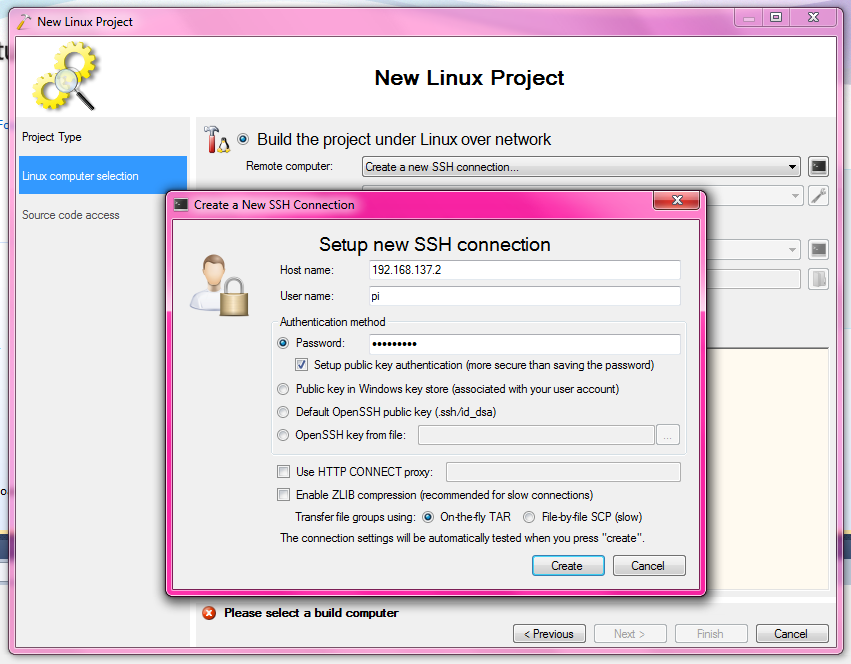
You will now need to configure how the program will transfer and compile to the Raspberry Pi.
To do this select "Create a new SSH connection..." under "Remote computer:" Set the "Host name:" to the host name assigned to the Raspberry Pi by DHCP, in this case it's 192.168.137.2.
Enter the Username: "pi". Set the password to "raspberry", unless you've changed it and enable "Setup public key authentication (more secure than saving the password)".
Enter the Username: "pi". Set the password to "raspberry", unless you've changed it and enable "Setup public key authentication (more secure than saving the password)".
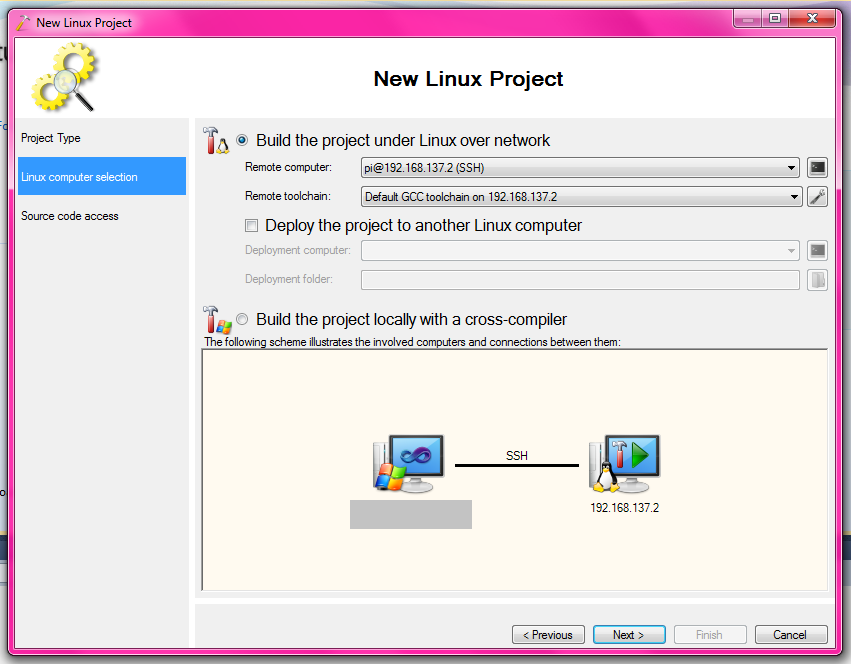
Leave all other settings as is. Then click "Create". Save the host key. From now on, you will no longer need to setup this kind of SSH connection, simply select
"pi@IP-ADDRESS(SSH)" under "Remote computer:" Click "Next" to continue.
"pi@IP-ADDRESS(SSH)" under "Remote computer:" Click "Next" to continue.
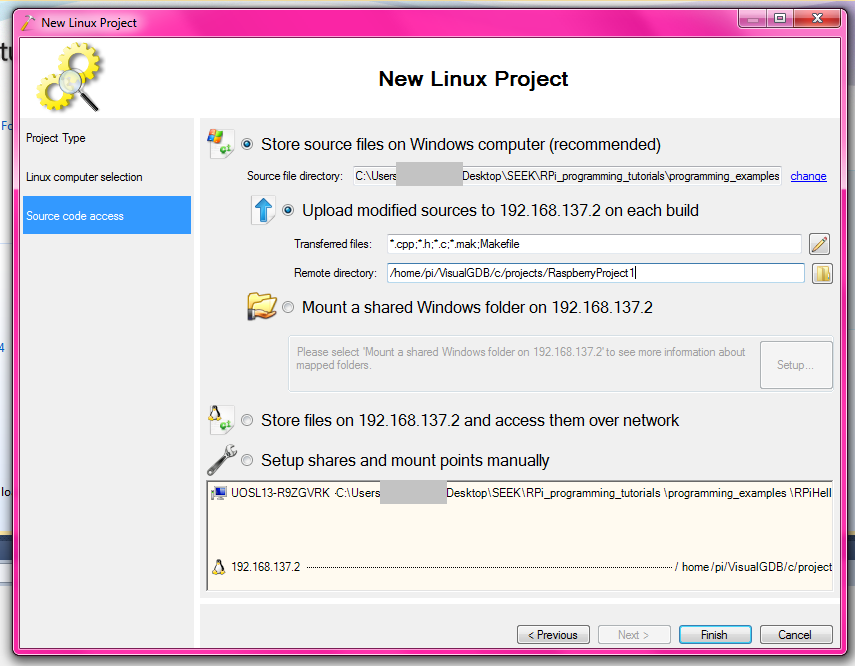
On the following screen, change "Remote directory:" to /home/pi/VisualGDB/c/projects/RaspberryProject1, do not change anything else, then click "Finish".
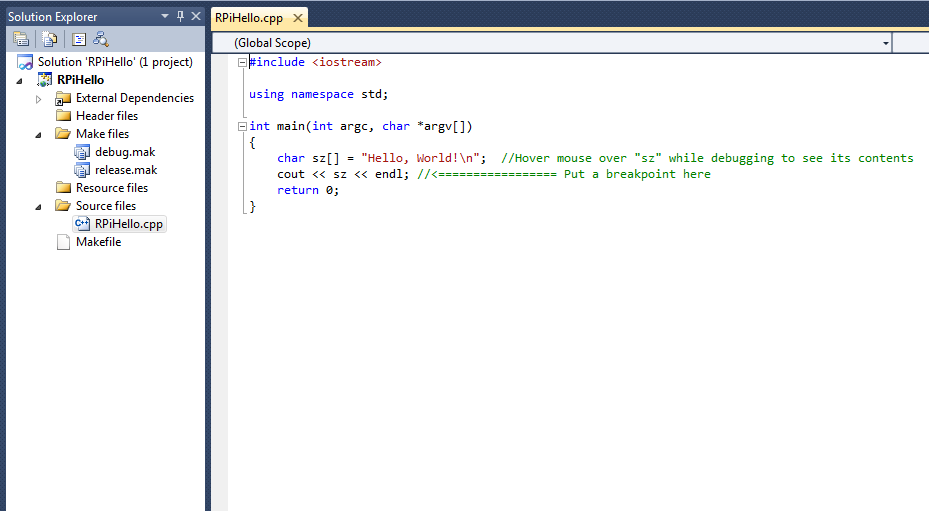
Under "Solution Explorer" go under "Source files" and click on the .cpp file for the project. You will see that the source code for a "Hello, World" program has already been written.
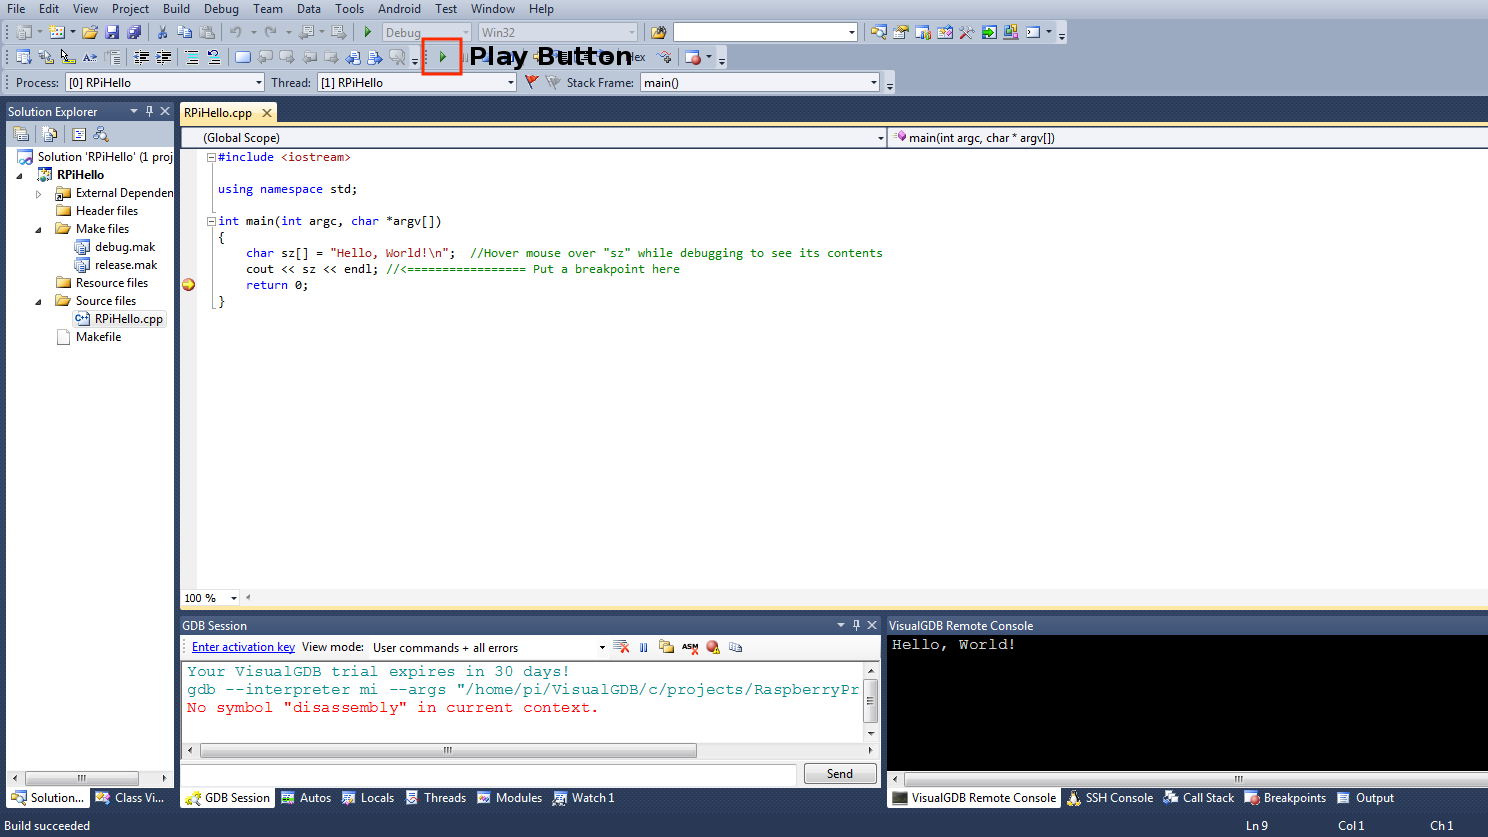
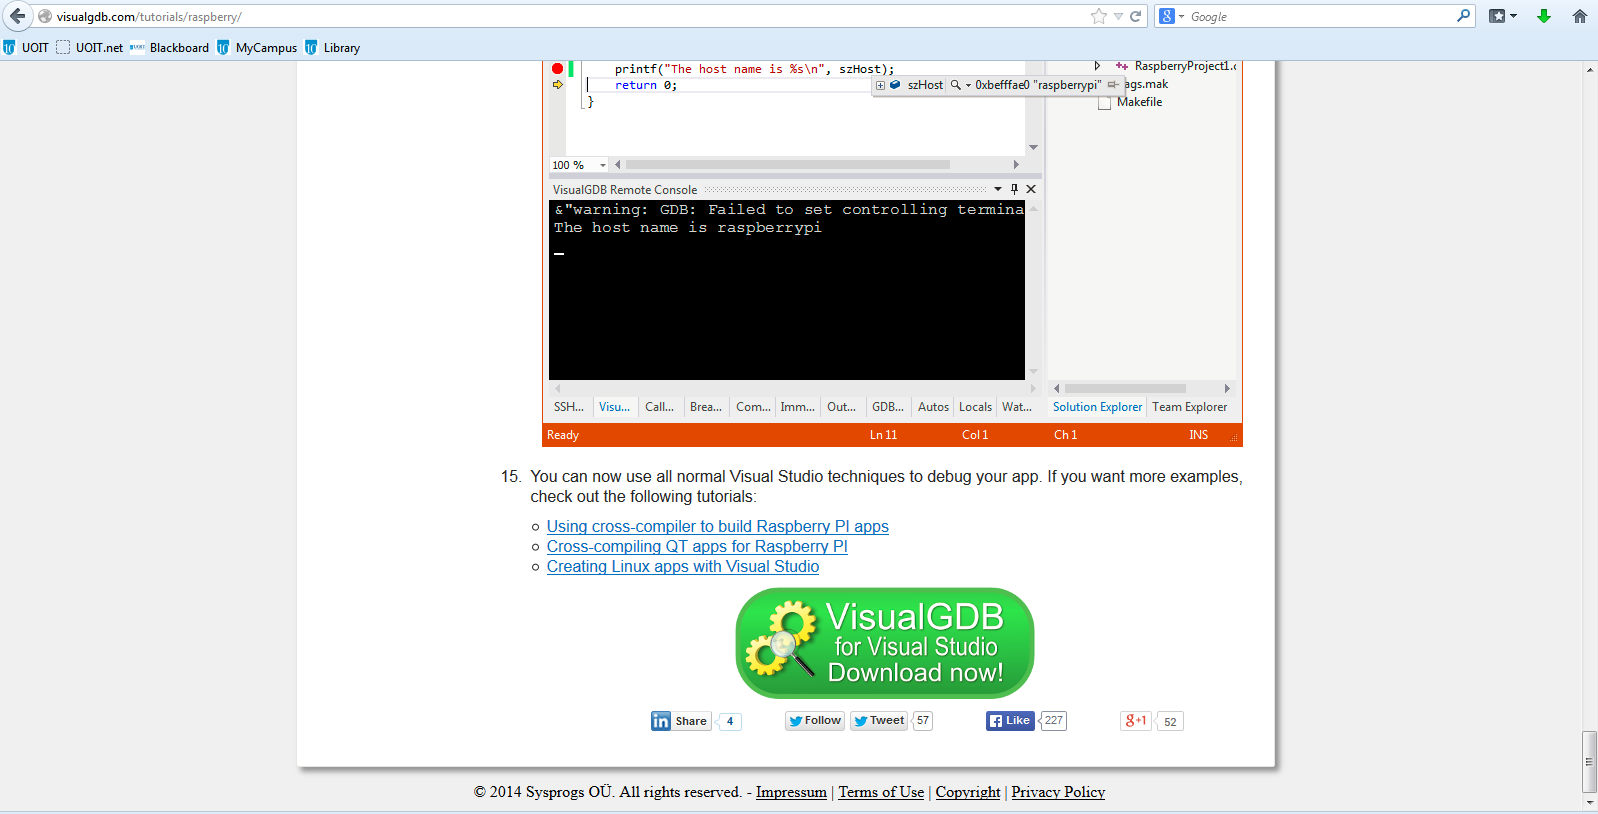
Clicking on the green play button will cause the program to be copied, compiled and executed on the Raspberry Pi and it's output will be displayed on a console but only for a short amount of time.
To make this output be displayed for a longer amount of time, add a breakpoint at the "return 0" line. Then click the green play button, and always say yes to building the latest version.
You now have 3 different ways to program your Raspberry Pi in C++!
To make this output be displayed for a longer amount of time, add a breakpoint at the "return 0" line. Then click the green play button, and always say yes to building the latest version.
You now have 3 different ways to program your Raspberry Pi in C++!