Preparing SSH (Secure Shell) - Advanced
-
Connect and get direct SSH access to Raspberry Pi without HDMI monitor or keyboard.
This tutorial shows you, step by step, how to set up your Windows computer for connecting to your Raspberry Pi via Ethernet connection..

SSH is a secure remote connection protocol that makes it easy to remotely log in to other computers on a network.
This is the easiest way to SSH and login into your Raspberry Pi for running programs or transferring files back and forth. You have to set up a DHCP server on your Windows computer - sounds fancy but simple if you read ahead. These steps are easy and will quickly start a DHCP server. Once started, the DHCP will assign an IP address to your Raspberry Pi when you connect it to your Windows machine via Ethernet. Once you have the IP address of the Raspberry Pi, you will us a software called Putty to SSH to it. The following steps and figures will make it easy for you to do.
This is the easiest way to SSH and login into your Raspberry Pi for running programs or transferring files back and forth. You have to set up a DHCP server on your Windows computer - sounds fancy but simple if you read ahead. These steps are easy and will quickly start a DHCP server. Once started, the DHCP will assign an IP address to your Raspberry Pi when you connect it to your Windows machine via Ethernet. Once you have the IP address of the Raspberry Pi, you will us a software called Putty to SSH to it. The following steps and figures will make it easy for you to do.
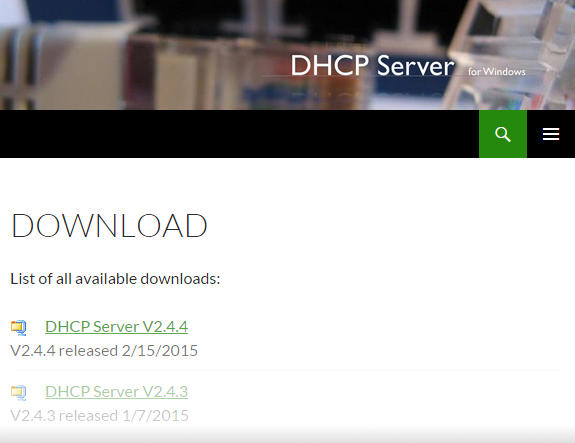
Download the latest version of DHCP Server for Windows from the official site: http://www.dhcpserver.de/cms/download/
Save it in your folder of choice.
Follow the next step before installing DHCP Server.
Save it in your folder of choice.
Follow the next step before installing DHCP Server.
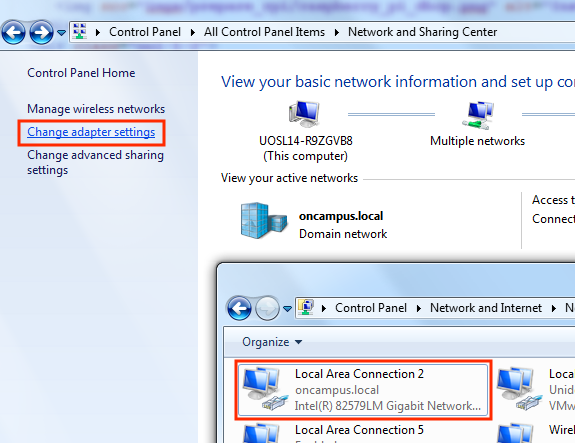
Navigate to Windows Control Panel > Networking and Sharing Centre > Change Adapter Settings.
You will see your Local Area Connection listed. Right-click it and select Properties
You will see your Local Area Connection listed. Right-click it and select Properties
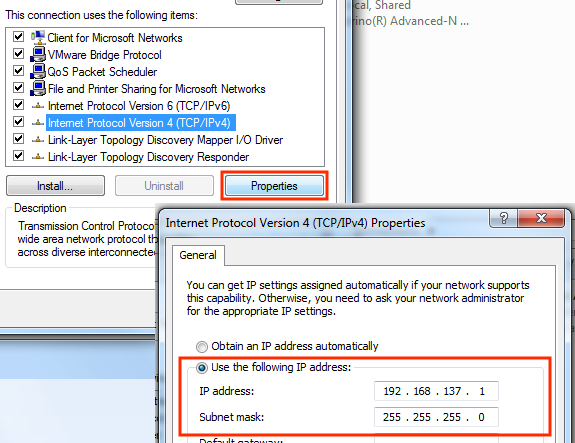
Click the Internet Protocol Version 4 (TCP/IPv4), then select Properties.
Select Use the following IP address and enter 192.168.137.1 as shown in the figure to the left. This is now the static IP Address of the computer you are using. This address will be used in later tutorials as to allow internet access on the Raspberry Pi.
Once completed click OK for both windows.
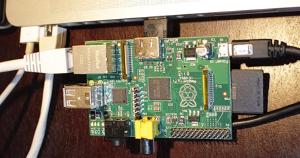
You may now connect your Raspberry Pi to your computer using an Ethernet cord. Make sure to power it via USB or power adapter.
Select Use the following IP address and enter 192.168.137.1 as shown in the figure to the left. This is now the static IP Address of the computer you are using. This address will be used in later tutorials as to allow internet access on the Raspberry Pi.
Once completed click OK for both windows.
You may now connect your Raspberry Pi to your computer using an Ethernet cord. Make sure to power it via USB or power adapter.
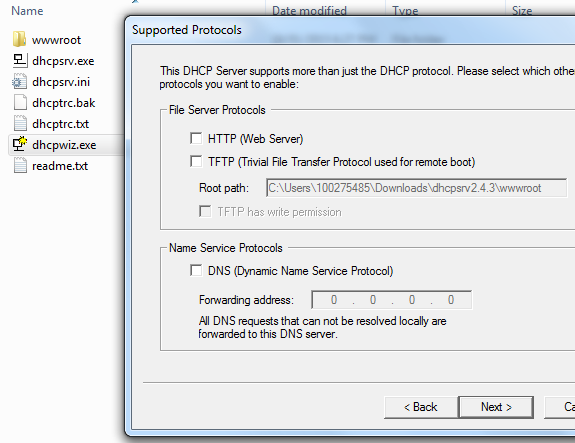
Navigate to the folder where you saved DHCP Server for Windows. Unzip the files and double-click the dhcpwiz application.
This will open the DHCP Configuration Wizard.
Your Local Area Connection should be listed with the IP address you gave it (192.168.137.1). Select it and click Next.
Leave all the Support Protocols unchecked.
Your Local Area Connection should be listed with the IP address you gave it (192.168.137.1). Select it and click Next.
Leave all the Support Protocols unchecked.
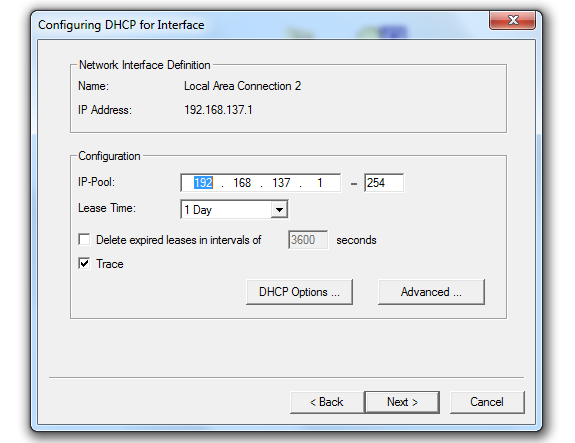
The current IP-Pool can give 253 unique IP addresses to 253 unique devices or Raspberry Pis in a network.
Note: if you make it 192.168.137.1-2, it will give your connected Raspberry Pi an IP of 192.168.137.2 because IP 192.168.137.1 belongs to your laptop - remember, you had assigned it before to your laptop manually, via the Networking and Sharing Centre.
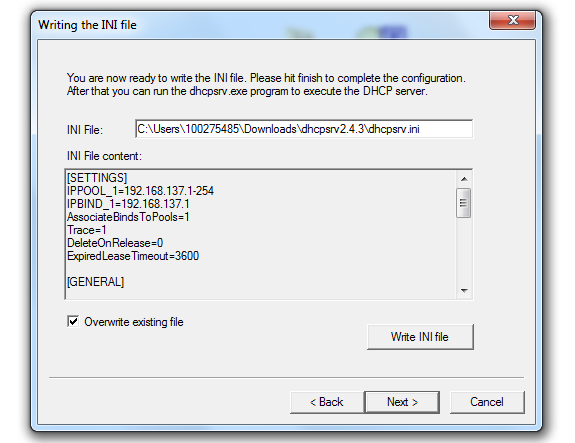
Generate an .ini file, by clicking Write INI file. This file will save the configurations for the DHCP server once it is started.
It is good practice to select "Overwrite existing file" whenever repeating this process.
It is good practice to select "Overwrite existing file" whenever repeating this process.
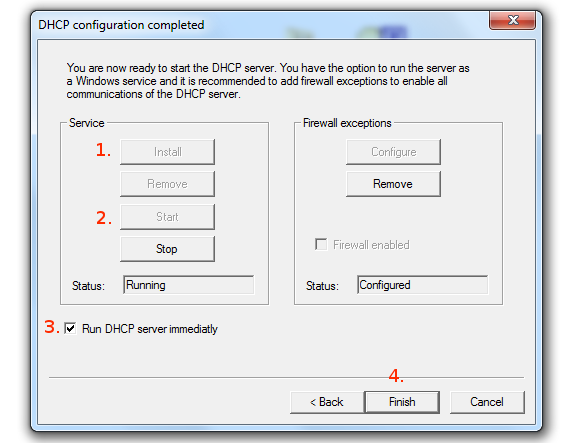
For the last step, select these options in order:
-
1. Install
2. Start
3. Run DHCP server immediately
4. Finish
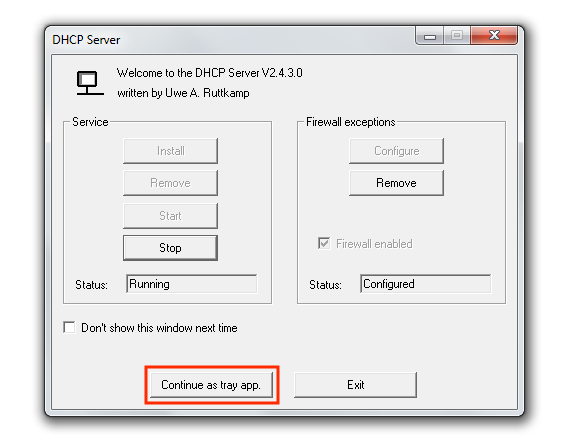
After you hit "Finish", another window will appear asking if you want to continue running the server as a tray app on your toolbar.
Select Continue as tray app. An IP address will be assigned to the Raspberry Pi or any device connecting to your computer via Ethernet cable.
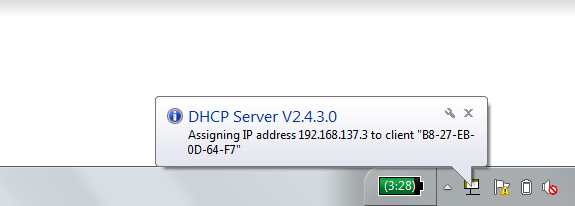
As shown in the figure to the left, a tool-tip should appear stating the IP address of your device.
The addresses will range from 192.168.137.1 to 192.168.137.254.
Yours will likely be 192.168.137.2
NOTE: If nothing appears after a few minutes, simply disconnect and reconnect the device's power supply
Yours will likely be 192.168.137.2
NOTE: If nothing appears after a few minutes, simply disconnect and reconnect the device's power supply
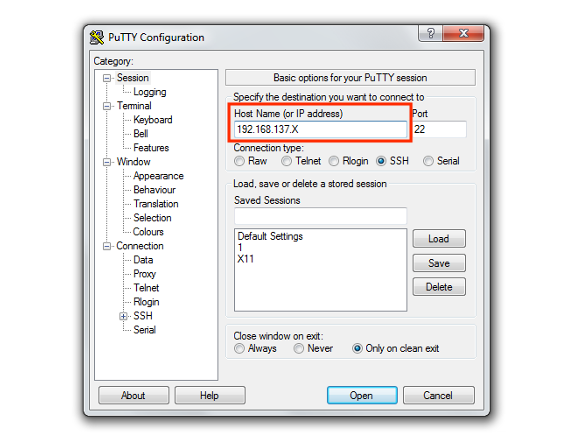
Next you will need to download a piece of software called PuTTY.
It can be downloaded directly from here
Enter the IP address given in the previous step, replacing the "X" with your devices unique number.
Hit "Open" when ready.
You will likely be prompted with a message asking if you want to trust the device, simply hit "Yes".
It can be downloaded directly from here
Enter the IP address given in the previous step, replacing the "X" with your devices unique number.
Hit "Open" when ready.
You will likely be prompted with a message asking if you want to trust the device, simply hit "Yes".
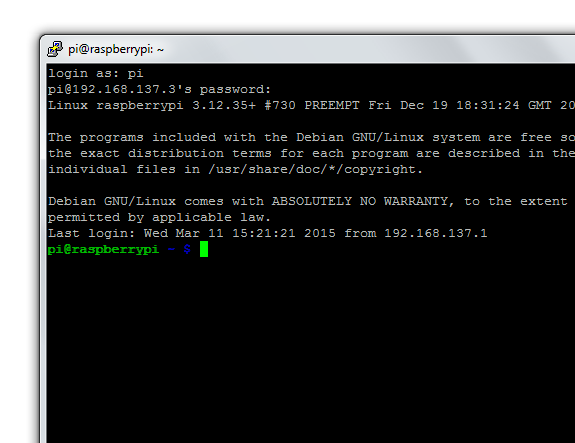
You will now be prompted to enter your login (pi) and password (raspberry).
Note that the password will not appear when you type it.
Once those have been entered correctly, you will have access to your Raspberry Pi via SSH.
Once those have been entered correctly, you will have access to your Raspberry Pi via SSH.